

Baguette: A French Tradition
By Cat, May 2014 (Photo, right, from Wikimedia Commons)
- Includes: 1. Le Pain Ordinaire (French Bread)
- See also: 1. Bread Basics (Yeast-Leavened Breads); 2. Bread & Rolls Menu; 3. French Baguette Mini Loaves
Back in the 1970s, when I was in my French period, I longed to be able to make my own baguette bread. The closest I could find in my recipe books was a recipe for French Bread in The Vegetarian Epicure, by Anna Thomas (1). Of course I had to try it, but I never really got it quite right, perhaps because I did not have the right equipment or ingredients, but the experimentation was great fun. Read on for possible explanations, and for the recipe.
One problem was that my loaves would rise laterally rather than vertically, probably because I could not find bread flour. So I bought a baking pan made for 2 loaves, with rounded bottoms, to contain the sides of the loaves while rising and baking, but I was not happy with that result either. Other problems included:
- I didn’t have a scale to weight my ingredients, so I used the less accurate volume measurements;
- I didn’t realize that the dough should be soft, and worked in too much flour;
- Portland’s water was chlorinated and I didn’t have a filter to remove that;
- My inability to keep enough steam in the electric oven while baking, so the crust would not get as crisp as it should be.
Eventually I gave up, as it became easier to find real baguette in the grocery store – not quite as good as what I had from a French bakery in San Francisco, but good enough. And by the ’90s, bakeries featuring rustic and French-style breads, with wood-fired brick ovens, opened up in my neighborhood.
Le Pain Ordinaire (French Bread)
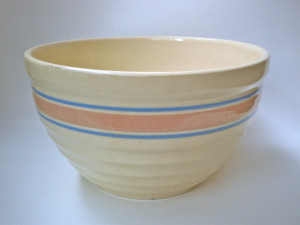
Vintage pottery bread bowl
(Image, right, is from Etsy (4), is the same as my Dad’s bread bowl from the 1920s)
This recipe is adapted from The Vegetarian Epicure, by Anna Thomas (1), the recipe that was the basis of my first attempt at making baguette. This is an all-white bread recipe, and the amounts are measured in English volumes, rather than weighed; I highly recommend trying the Mini Baguette recipe which uses weight measures (ounces), to get an idea of how the dough should feel.
Unlike recipes for baguette, this includes butter in the dough, making it more like the American French Bread that is used for sandwiches or garlic bread.
Makes 3 loaves (about 15″ – 16″ long and 3″ wide).
Notes about Ingredients:
Do not use all-purpose flour for this recipe. You need hard wheat flour, preferably unbleached. I don’t recommend bread flour because it contains toxic bleaching ingredients (bromine).
For preparing pans for baking: use Organic cornmeal to avoid GMOs; Bob’s Red Mill brand cornmeal is GMO-free, per their statement on their website. Or use semolina flour (I buy this in bulk at our local Organic store, Mountain Valley Foods). See Wheat (about) for more about semolina.
Ingredients & Equipment
- 1 heaping tsp real butter
- 1 heaping tsp unrefined sea salt
- 1 heaping tsp Rapadura or white cane sugar
- 2 cups boiling, filtered water
- 1 Tbsp dry yeast
- ⅔ cup lukewarm filtered water
- about 6 to 6 ½ cups unbleached white hard-wheat flour (as from King Arthur); see Notes about ingredients, above
- Organic yellow corn meal or semolina flour
- Equipment
- large bowl for mixing dough (I used my Dad’s bread bowl; see image, above)
- wooden mixing spoon
- working surface for kneading dough (I use my Dad’s large wooden bread board)
- baking sheet or rounded French bread baking pans
- very sharp knife
Method
- Combine butter, salt, sugar and 2 cups boiling water in large mixing bowl. Stire to dissolve.
- Sprinkle yeast over ⅔ cup lukewarm water in a 1-cup bowl or pyrex measuring cup, and allow it to dissolve and proof.
- When butter mixture is lukewarm (105° -115°F), add proofed yeast to butter mixture, and mix well.
- Add flour, a little (about ½ cup) at a time, mixing well after each addition. When about 4 cups have been added, and dough is beginning to get thick, stir vigorously about 10 minutes with a sturdy wooden spoon.
- Continue to add flour until dough is too stiff to stir, turn it out onto a large, floured board and let it rest while you clean and oil the bowl.
- Knead dough, adding small amount of flour as necessary.
- First rise: When dough is smooth and elastic, form it into a ball and place in prepared bowl. Cover with damp cloth and place in a warm spot (80° – 90°F) to rise, about 1 ½ hours, until doubled in bulk (see Bread Basics for finger test for rise in bowl). If chosen spot is cooler, it will just take longer to rise.
- Second rise: Punch down and let rise again until doubled, about 1 hour.
- Butter baking sheet, then sprinkle semolina or corn meal lightly over the butter.
- Shape loaves: Divide dough into 3 parts (use method described in Mini Baguette recipe to fold into a rectangle, then cut dough crosswise into 3 parts).
- Shape each part into very long, very slender loaf as follows: fold lengthwise as described in Mini Baguette recipe, stretch lengthwise and repeat the lengthwise fold method, until you have a rectangle about 15″ long and 8″ – 10″ wide. alternately, you can roll the dough to size, but because it is so elastic, it tends to resist the rolling.
- When rectangle reaches proper size form loaf as in Mini Baguette recipe, or by tightly rolling up the long side. When finished, it should be about 1 ½” wide. Seal the seam and the ends by pinching. Place each loaf on the prepared baking sheet, leaving a small space between them.
- Final rise: Cover with a dry tea towel and let rise until almost double in bulk (see Bread Basics for finger test for rise in pan). Brush tops with cold water, and with a thin, very sharp knife, make 4 or 5 slashes on a sharp diagonal, ⅛ to ¼” deep, on the tops of each loaf. NOTE: if you knife is not ultra sharp, you will deflate the dough while trying to make the slashes.
- Meanwhile, preheat oven to 400° F.
- Bake: When loaves have risen, transfer baking sheet to ove, to bake almost 1 hour. Eery 15 minutes, brush tops with more water. Alternately, use one of the steam methods described below.
Two methods to provide steam in the oven
A moist baking environment is essential for the cripsy crust of baguette, and of rustic breads. Some newer ovens have a feature to provide steam in the oven. If you don’t have such a feature, there are two ways to provide steam while your bread bakes.
Steam method #1: Spray bottle
This is the method from the Fine Cooking recipe (1). I have tried this method, but I think the second method (below) works better)
Caution: Use oven mitt that covers lower arm, while spraying water
- Have a spray bottle filled with water at the ready.
- After oven is fully heated to 500°F, and just before putting your loaves in the oven, spray the bottom and sides of the oven. Quickly place the baking sheet(s) with their loaves on the oven rack(s). Spray oven bottom and sides once more (you might also spray the tops of the loaves), and close the oven door.
- For this recipe, reduce heat to 475°F.
- After 5 – 6 minutes, turn the loaves over on their baking sheets. If you have loaves on both racks, swap their positions and then spray once more. Close the door and for this recipe, bake 5 minutes more.
Steam method #2: skillet or baking pan
This method is mostly from The Fresh Loaf’s recipe for ciabatta integral (2),but rather than using boiling water as per The Fresh Loaf, I use ice water (it will quickly steam in the hot oven), as for Ciabatta and rustic breads. See also my recipe: Ciabatta Integrale (whole grain).
Caution: Use oven mitt that covers lower arm, while adding water to pan.
- Place an old metal baking pan or cast iron skillet on floor of oven, and let it heat (empty) while oven is preheating to 500° F.
- Place bread in oven, then pour ice water into pan, enough to almost fill the pan. Quickly close door.
- For this recipe, reduce oven to baking temperature to 475° F.
- After 5 – 6 minutes, turn the loaves over on their baking sheets. If you have loaves on both racks, swap their positions and add more ice water to pan, if needed.
- Close the door and for this recipe, bake 5 minutes more.
References
- The Vegetarian Epicure, by Anna Thomas