
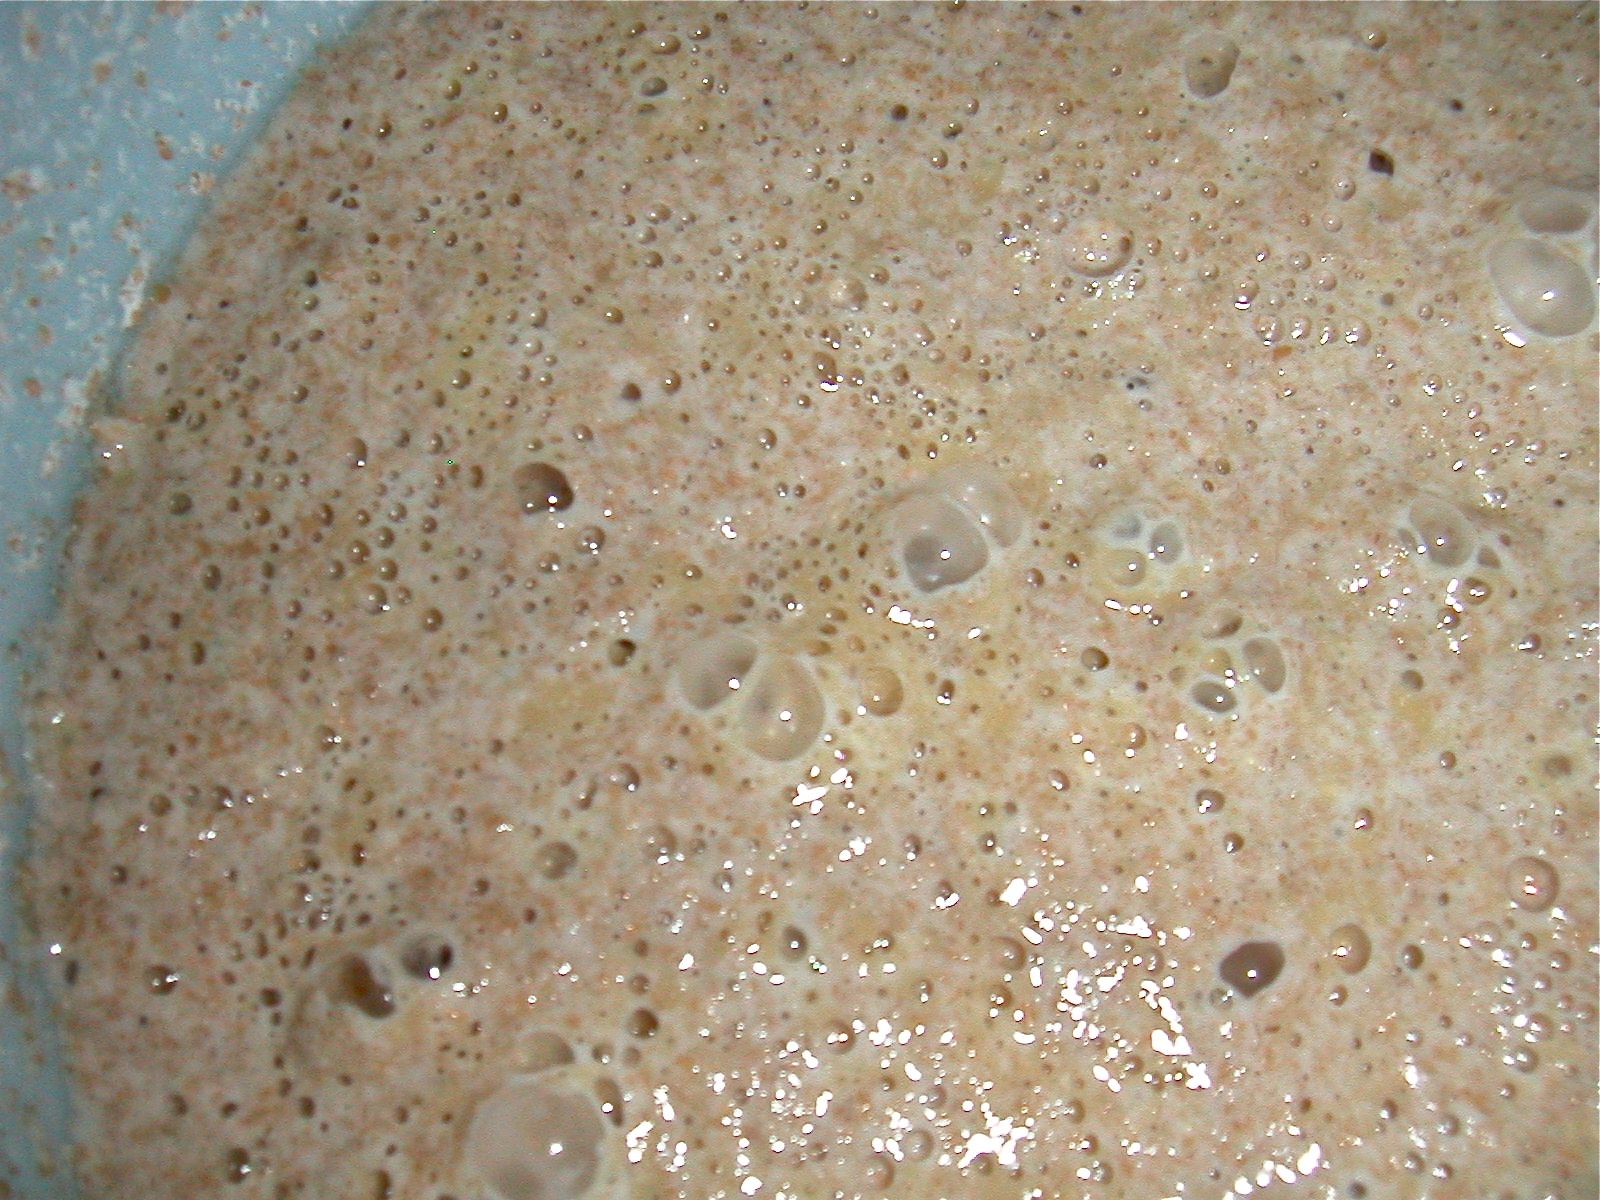
Bubbly sponge
By Cat, Jul 2011, updated Jul 2012 (Photo and active sponge, right, by Cat)
Includes: 1. Carla Emry’s Sponge Method – modified for 1 loaf, July 2011; 2. Testing Tassajara Sponge Method, Aug 2011, Feb – May 2012; 3. Testing Tassajara Sponge & Autolyze Method, June 2012; 4. Learnings from testing
See also: 1. Sourdough Introduction; 2. Sponge Methods for Sourdough Bread, an Overview; 3. Carla Emry’s Sponge Sourdough Method (& Testing); 4. Tassajara Sponge Method for Sourdough Bread (with optional autolyze); 5. Bread & Rolls menu;
I revised Carla’s recipe for testing by reducing the ingredients to make just one loaf. To do this, I used the total ingredient amounts for my version of Ronny’s Simple Sourdough Bread (modified for my smaller loaf pan).
I also used the general sponge-method instructions from the Sourdough Baker (see Sponge Methods for Sourdough Bread, an Overview and scroll down to “Sourdough Baker Sponge Method with Autolyze”) as a guide.
Modified Carla Emry sponge recipe for testing 1 loaf
I revised Carla’s recipe for testing by reducing the ingredients to make just one loaf. To do this, I used the total ingredient amounts for my version of Ronny’s Simple Sourdough Bread (modified for my smaller loaf pan). See Carla Emry’s Sponge Method for Sourdough Bread for testing notes and learnings. I include the testing ingredients here, for comparison with Tassajara testing ingredients.
- Ingredients: Sponge
- ⅔ cup starter
- ¾ cup lukewarm water
- 1 ½ cups whole grain flour
- After sponge-rest:
- 1 tsp soda (didn’t use)
- ½ cup oil (didn’t use)
- 1 ½ cups whole grain flour
- 2 tsp unrefined sea salt
Testing Tassajara Sponge-method, for 1 loaf
The ingredients are similar to what I’ve been doing with Ronny’s Simple Sourdough Bread and Carla Emry’s Sponge method except Tassajara adds oil. What is different is the process, especially in order and method for mixing the ingredients.
The original recipe makes 2 large loaves, so for testing, I adapted for only 1 loaf and my small loaf pan. I started with the amounts tested for the Carla Emry recipe (adjusting for removal of sponge to be new starter), plus oil. I will continue using my pilot-lit broiler (off) resting/rising starter and dough if the room is cool.
After testing, I conclude that including an autolyze step provides the best result. NOTE that the autolyze version used spelt flour which requires less water than when using wheat.
The following have been updated per testing, with autolyze step; amounts in parenthesis are original amounts, before testing.
- Ingredients for Sponge (1 loaf):
- ¾ cup active starter
- 2 ¼ cups whole grain flour (1 ¾ – 2 ¼ *)
- 1 cup warm water, plus up 6 Tbsp for spelt, or 10 Tbsp for wheat, added 1 Tbsp at a time. (1 ¼ – 1 ½ *)
- After sponge rest:
- ¼ cup olive oil (optional)
- 1 ¾ – 2 cups whole grain flour (1 ½ – 1 ¾)
- After autolyze:
- 2 tsp unrefined sea salt
- up to ¼ cup unbleached white flour for kneading
* NOTE the lower end of the range is from testing Carla Emry’s recipe; the upper end of the range is anticipating removal of ¾ cup sponge to replenish the starter.
Testing totals for water, flour:
- Aug 2011: Water = 1 ¼ cup; flour = 3 ¾ cups + 2 Tbsp + 0 net starter (sponge only)
- Feb 2012: Water = 1 cup + 1 Tbsp; flour = 3 ¼ cups + 2 Tbsp + 0 net starter (sponge only)
- Mar 2012: Water = 1 cup; flour = 3 cups + 2 Tbsp + 0 net starter (sponge only)
- May 2012: Water = 1 ⅜ cup; flour = 4 ¼ cups + 2 Tbsp + 0 net starter (larger loaf, sponge only)
- June 2012: Water = 1 ⅜ cup; flour = 4 cups + 5 Tbsp + ~0 net starter (larger loaf, sponge & autolyze)
- Sponge: Sift flour into large mixing bowl. Add starter without mixing. Then mix together while adding water gradually, until thick and pasty. Beat well (100 strokes) to develop the gluten. Cover and let rest overnight. NOTE: if using spelt, you will need less water, and rest sponge no more than 8 hours.
- Next morning: Remove same amount of sponge as starter used originally (¾ cup), to replenish your starter.
- Sprinkle oil and salt over sponge, then stir to combine while adding flour a bit at a time until incorporated. Allow it to rest about 5 minutes if it gets hard to work. When it comes away from the sides of the bowl, remove to a floured board to knead about 5 minutes. It will be softer and stickier than yeasted bread.
- Shape loaf and put into a greased/buttered loaf pan, seam up. Should fill ¾ of space in the pan. Rotate loaf so seam is down and buttered side is up. Cut diagonal slits in top of each dough. Let rise in a warm place, until almost doubled in bulk, or until it is a little above the top of the pan, about 2 hours. NOTE: will take less time if using spelt.
- About 30 minutes before the rise is finished, preheat oven to 425°F. When hot, spritz loaves with water (or brush it on), and place in hot oven to bake for 20 minutes. Reduce heat to 375°F and bake about an hour longer, until internal temperature of 190°F
- Remove bread from pans to cool thoroughly on rack before slicing.
Testing Tassajara Method, with Whole Wheat, 8/9-10/2011
- Prior to starting, I had to revive my starter after being away for 8 days (to Portland). It had a charcoal color at the top, underneath the hooch. In the evening, I poured off the hooch and skimmed of the charcoal, leaving about ⅓ cup tired, sweet-smelling starter. I fed it 4 Tbsp water and 2 Tbsp whole wheat flour (more water because it was too thick after pouring off hooch). Each of next 2 days, in the morning, I fed it another 4 Tbsp water and 3 ½ Tbsp flour; after bubbling up, it totally fills the pint jar.
- Added 2 ladlefuls starter (just shy of ¾ cup) to 2 cups flour in bowl, then worked in 1 cup warm water (105°F). Added more water, ¼ cup at a time, for 1 ¼ cup total. Resultant mixture is really soft, more liquidy than the original starter. Set in my pilot-lit broiler compartment, covered with damp cloth, to rise at 10:30 PM. Totals so far: water = 1 ¼ cup; flour = 2 cups + ¾ cup starter
- At 9 AM next day, it had a dry, brown crust on top with some hooch; I stirred these in. (didn’t need dry warmth of off-broiler). After stirring, I removed 2-ladlesfull very lively ferment to my starter crock. Continued with recipe, working in 1 ¾ cups flour in ¼ cup batches, allowing it to rest a couple times. Kneaded in 2 Tbsp white flour while shaping loaf. Very soft and elastic, and filled the buttered pan ¾ full (perfect). Totals so far: water = 1 ¼ cup; flour = 3 ¾ cups + 2 Tbsp + 0 starter (added/removed same amount)
- Rise: 30 min in off oven (not as warm as the broiler) for a half hour, covered with damp cloth, then 2 hr 15 min on top of stove (heat off, but some warmth from pilot light), on a simmer plate (for warm air circulation), as I will be gone for a couple hours. When I returned it had barely risen, so back into off-oven (4 ½ hrs). Removed from oven so I could preheat it, about 45 min. Loaf had risen above top of pan but is level rather than rounded on top. Total rise time, 7 hr, 15 min
- Spritzed top with water and put in oven to bake at high temp, 20 min. Then reduce heat to 375°F for about 55 minutes. It didn’t get much oven spring, but it is fairly bubbly, and not too sour. Actually, it tastes great! However, it got more sour each day.
Learnings:
- In summer’s warm weather, don’t put the sponge in the off-broiler; rather keep it on counter, or on pilot-lit stove (on a trivet, to allow air circulation) in cooler weather. For loaf rise, OK to put in off-oven to shorten rise time.
- Could have made a slightly larger loaf for the pan. Try increasing sponge amounts to 2¼ cups flour, and up to 1 ½ cup water.
Testing Tassajara Method, with Whole Spelt starter & flour, 2/22-23/2012
Testing with 1 loaf. Spelt needs less water than wheat. Also gluten works faster so need less rise time to double in bulk. Decided to start sponge in evening for shorter rest time overnight.
- Ingredients for spelt sponge: ¾ cup active starter
- 1 ¾ – 2 ¼ cups whole spelt flour
- 1 – 1 ¼ cups warm water
- After sponge rise: ¼ cup olive oil
- 1 ½ – 2 cups whole spelt flour
- up to ¼ cup unbleached white flour for kneading
- 2 tsp unrefined sea salt
(1.) At 7:30 PM, started with 1 ¾ cup freshly-ground whole spelt flour, ¾ cup starter and 1 cup water; beat 100-strokes to work gluten, but it doesn’t seem very worked. Also it’s pretty soft, but hard to tell if its right because the freshly-ground flour is a bit coarse. After letting it rest in warm spot for about an hour, with a damp plastic bag over the bowl, the coarse grains of flour had softened into the dough and it looks like the gluten is activated. I re-covered the bowl and let it rest overnight, on a trivet on top of my pilot-lit stove. About 13 hours sponge rest. Totals so far: water = 1 cup; flour = 1 ¾ cups + ¾ cup starter
(2.) Next day, 9 AM: sponge is wonderfully spongy and had not dried out on top. I removed ¾ cup to my crock for future starter, then added oil and salt. Added 1 ½ cups whole spelt then let it rest, as the coarse grain needed to soften. I think that was too much whole spelt. The dough is kneadable but a bit stiffer than I understand sourdough to be. So I added a bit of water, about 1 Tbsp and kneaded that in, then shaped for the pan. Used about ⅛ cup white spelt flour for kneading/shaping. Totals so far: water = 1 cup + 1 Tbsp; flour = 3 ¼ cups + 2 Tbsp + 0 starter (added/removed same amount)
(3.) Cut the slits and set to rise, with the pan placed inside a damp plastic bag, at 9:30 AM. After 90 minutes it had barely risen so let it rise til late afternoon. 4 PM, started oven to preheat; 4:45 PM loaf is almost to top of pan; brushed top with water and into oven; 7 hours, 15 minutes rise. After 20 min in oven, lowered to 375°F for 35 minutes, when internal temperature reached 190°F. Out of oven at 5:40, for total time 55 minutes.
Result: Didn’t get much oven spring. Crust shows signs of sourdough bubbles, as does the interior of the bread. It’s a bit heavy but not too sour. Pretty tasty.
Testing Tassajara Method, with Whole Spelt starter & flour, 3/12-13/2012
Testing with 1 loaf, with same starter as used for Feb Tassajara loaf, and March loaf of Ronny’s Simple Sourdough, and it is now more mature.
(1.) Started at 9 PM, using same amounts as above for the sponge (¾ cup starter, 1 ¾ cup flour, 1 cup warm water). This time, I’d ground the flour a bit finer so it mixed into the liquid better as I beat it 100-strokes. Covered bowl with damp plastic bag and let it rest overnight on the trivet, on top of my warm stove. Left to rise about 12 hours. Totals so far: water = 1 cup; flour = 1 ¾ cups + ¾ cup starter
(2.) 9 AM Next day, quite spongy. Removed ¾ cup to starter jar; added oil and salt. Added 1¼ cup whole spelt (since 1 ½ cup was too much last time) then let it rest 5 min. Added another not quite ¼ cup spelt, then kneaded on board dusted with 2 Tbsp white flour. Totals so far: water = 1 cup; flour = 3 cups + 2 Tbsp + 0 starter (Added/removed same amount)
(3.) Shaped into loaf and into buttered steel pan. Cut 3 slits on top, recovered with damp bag to rise, at 9:15 AM. It barely fills half a pan. At 11:30, I started the oven to preheat. The loaf has filled in the corners of the pan, and has risen to ¾ pan. Spritzed & into oven at Noon, then reduced heat at 12:22 PM. 2 hr, 45 min rise time.
Result: A little oven spring, but not as much as for the Simple Sourdough test – I wonder if the sponge should be a shorter time (since spelt works up faster), or a smaller percentage of the total amount of flour. Flavor is great and it has a nice texture. Like before, it has signs of sourdough bubbles on the crust.
Next time, increase total amount of flour (and consequently water) in sponge, while keeping the starter amount the same. Start sponge in morning (8 AM) and let rest 7 – 8 hours (3 – 4 PM); then make up loaf and let rise about 2 hours, then bake.
Testing Tassajara Method, with Whole spelt starter & flour, 5/12/2012
Follow recommendations from last batch, starting at 8 AM, increasing flour & water, and shorter sponge rise time. (NOTE: ingredient amounts are for wheat; spelt may take less water.
Bubbly sponge
- Ingredients for spelt sponge:
- ¾ cup active starter
- 2 ¼ cups whole grain flour
- 1 – 1 ½ cups warm water
- After sponge rise:
- ¼ cup olive oil
- 1 ¾ – 2 cups whole grain flour
- up to ¼ cup unbleached white flour for kneading
- 2 tsp unrefined sea salt
(1.) 8:15 AM: Used spelt flour and starter as written but only 1 ⅜ cups water to get it to the right texture. This batch of spelt flour is coarser-ground than usual, because it came from Jeffrey’s mill (ground at the Preparedness Fair last week), so may take longer to take up the water – didn’t want to give it too much and can always add more after it softens. Set it to rest, covered with damp plastic bag, at 8:30 AM. At 3 PM it is nice and bubbly (photo, above right). Totals so far: water = 1 ⅜ cup; flour = 2 ¼ cups + ¾ cup starter
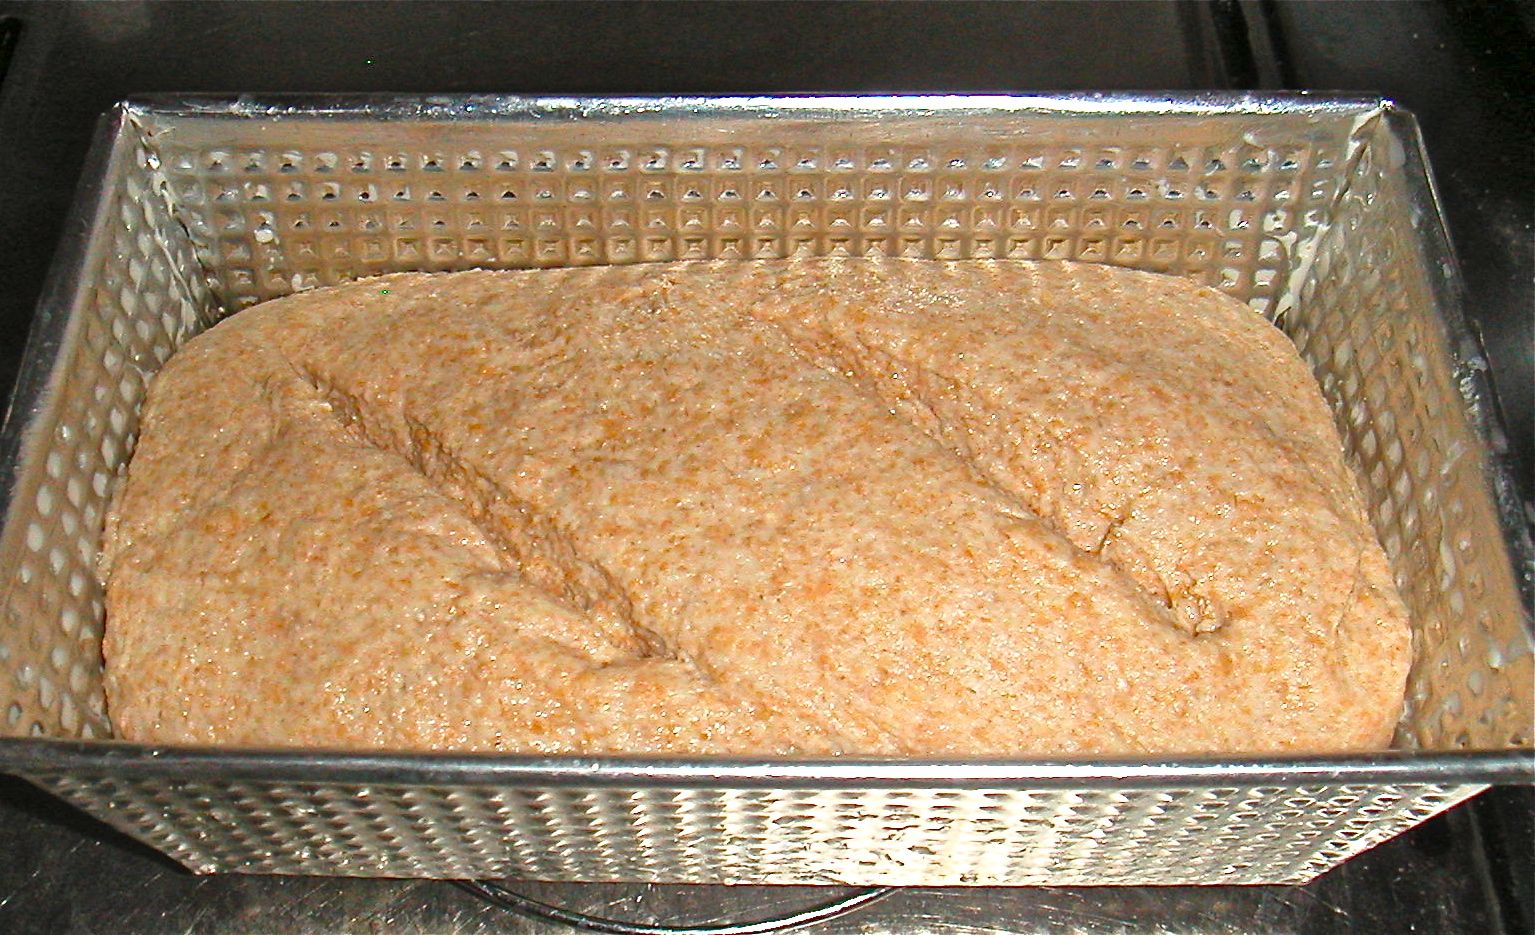
Loaf before rise
(2.) Removed amount for next starter, added oil, salt & 2 cups flour (⅓ cup at a time). Feels ready for kneading/shaping. Kneaded in 2 Tbsp white spelt flour; it fills small pan – perfect (photo, left). Totals so far: water = 1 ⅜ cup; flour = 4 ¼ cups + 2 Tbsp + 0 starter (added/removed same amount)
Cut slits in top and set to rise in damp plastic bag at 3:15.
(3.) It had risen to the top of the pan at 5 PM, so brushed top with water and put it in 425°F oven for 20 min, then 55 min at 375°F until it reached 190°F internal temperature at 6:25 PM. Removed to cooling rack (photo below). It got a little oven springso that it was a bit above the top of the pan, and it baked to a nice amber.
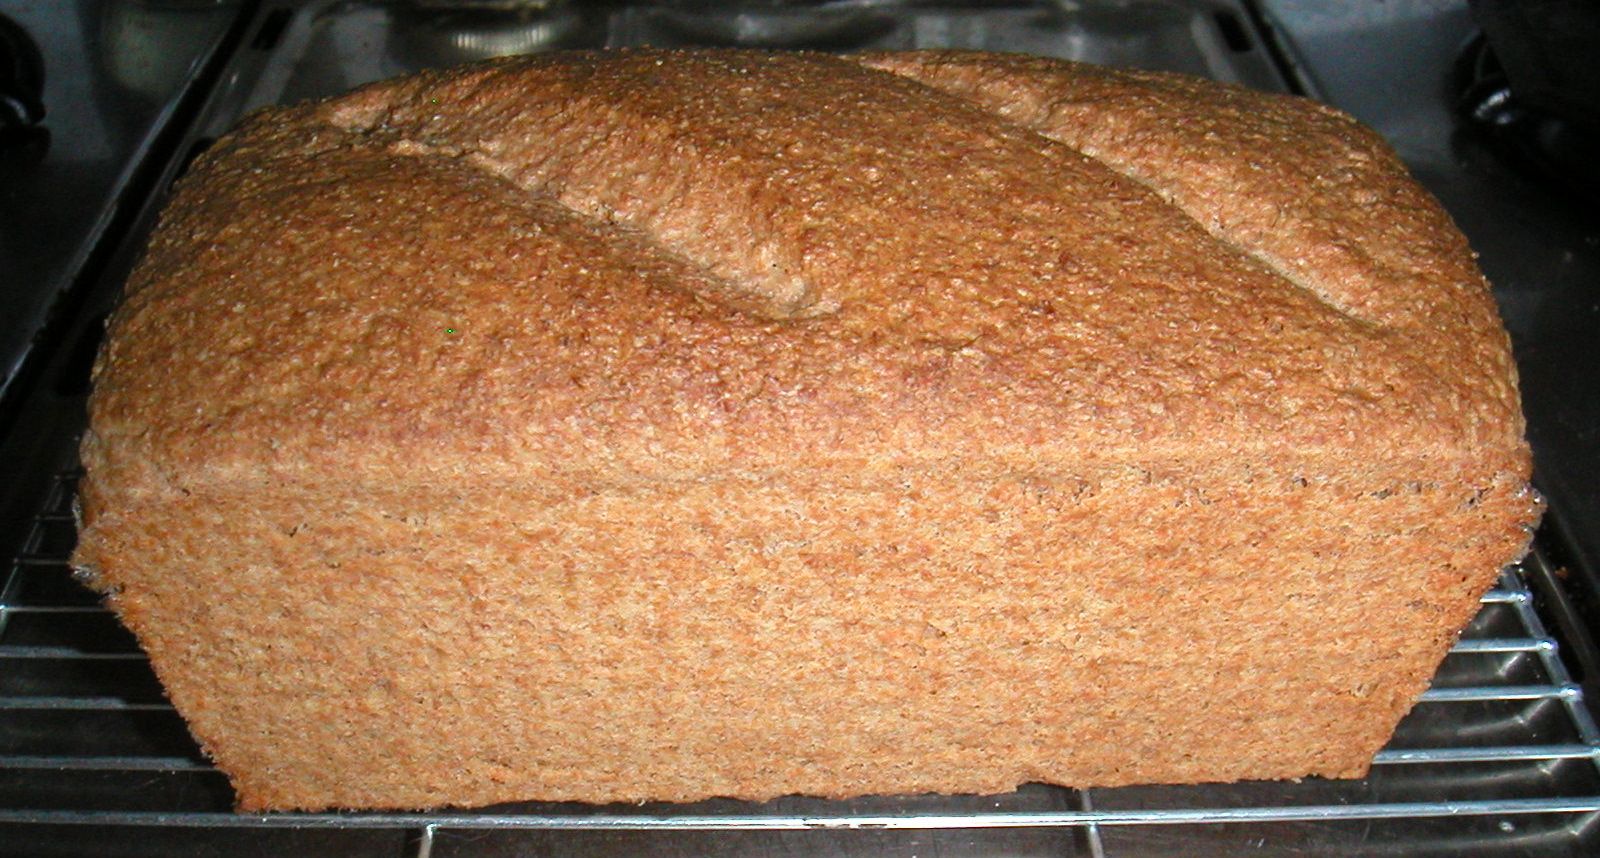
Baked loaf, cooling
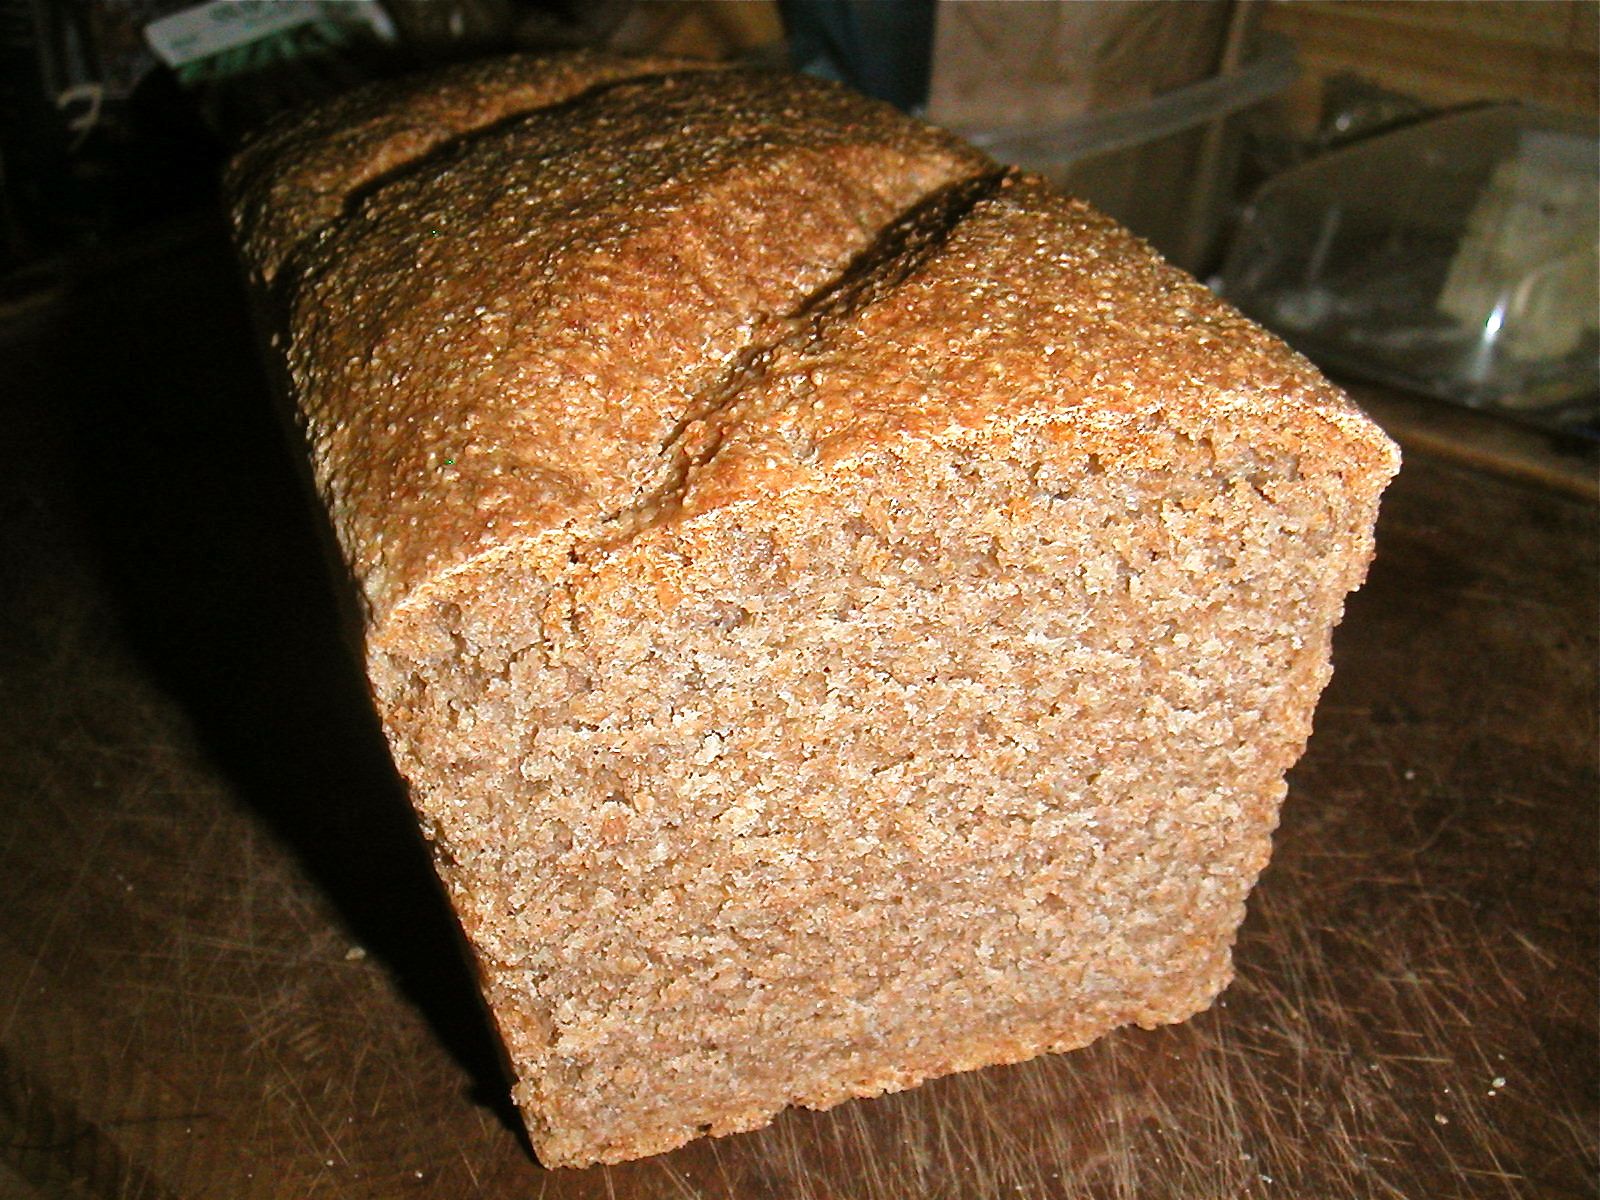
Loaf after slicing
Result: Not too heavy and it tasted sooooo good – slightly tart, nicely sweet and nutty (photo, left). But I wish it had risen more.
Next up, with try adding an autoyze period, which delays addition of salt and oil a bit, in hopes this will get a better rise.
Testing Tassajara Method with Autolyze; Whole spelt starter & flour, 6/22-23/2012
I used my whole spelt starter, and freshly-ground whole spelt flour for this test, and followed Tassajara method, modified for autolyze process (per NWSourdough’s Autolyze Experiments #1 and #2 (3)). NOTE: if use whole wheat flour, will need more water or less flour in sponge; sponge rest time will increase to about 8 hours, and subsequent rise may also take longer.
Note this version gets more rest/rise time: In addition to initial sponge rest, it gets the autolyze rest after adding remaining flour, a rise before shaping loaf, and final rise before baking. t will take one long day to complete. alternately, could put the sponge in the fridge for longer overnight rest, but then the next day need to let it come to room temperature before adding remaining flour (I think), so will about break even.
- Ingredients for spelt sponge:
- ¾ cup active starter
- 2 ¼ cups whole spelt flour
- 1 ¼ cups + 2 Tbsp warm water
- After sponge rise:
- ¼ cup olive oil
- 1 ¾ – 2 cups whole spelt flour
- up to ¼ cup unbleached white flour for kneading
- 2 tsp unrefined sea salt
- Sponge: Combine water and starter to make a slurry. Add flour for sponge and mix it in. Place bowl in moistened plastic bag and let rest 5 – 6 hours. >> Remove ¾ cup starter (2 ladles-full), to perpetuate starter.
- Autolyze: Work in remaining flour, kneading as necessary, then let rest 2 hours
- Add salt and oil, and mix into dough, kneading as necessary.
- First Rise: Place dough in oiled bowl, rotating to coat all surfaces with the oil. Place bowl in moistened plastic bag and let rise until doubled (use ‘in-bowl’ finger indent test) after 1 hour, then every 30 minutes after), about 2 hours total.
- Punch down, flatten to about 1” thick, roll into a cylinder and seal the seam. Place in buttered pan (seam down). Spritz/brush with water and cut slits on top.
- Second Rise: Place again in moistened bag and let rise again, at least until it is above top of pan (use finger indent test fir ‘in pan’). Preheat oven to 425°F about 30 minutes before end of rise.
- Bake: Spritz again with water; also sides of oven. Possibly add boiling water to pan in bottom of oven. Place loaf in preheated oven and bake 20 minutes. Reduce oven to 375°F and bake about 45 – 55 minutes, to 190°F internal temp.
- Remove from pan to cooling rack.
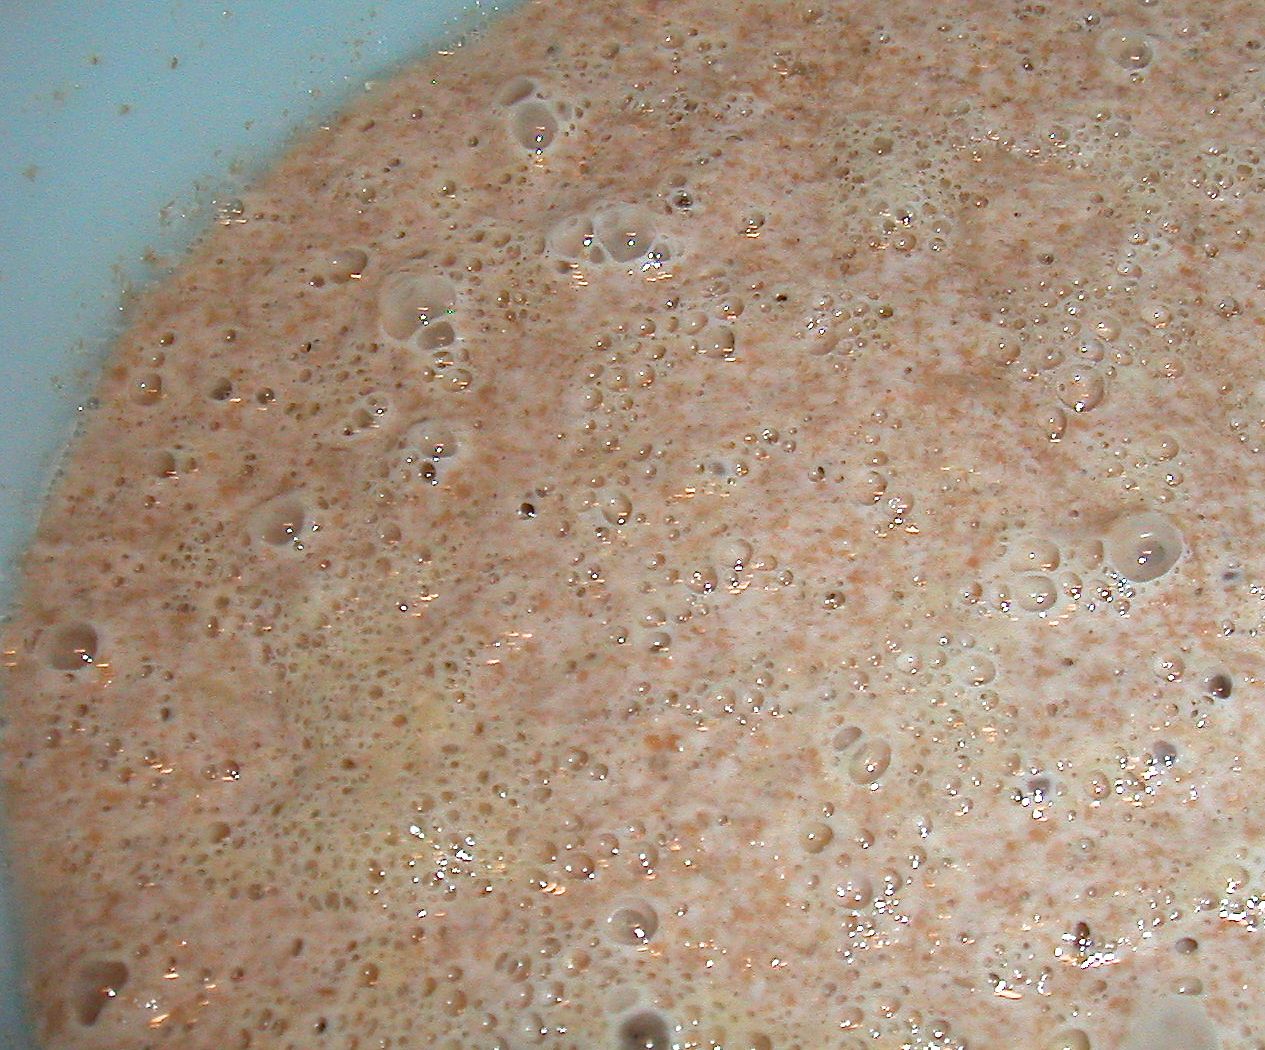
Bubbly sponge
Testing Autolyze 6/22/12:
Photo, left of sponge ready for next step – quite active!
(1.) OOPS used 3 ladles-full of starter in error (about 1 ⅛ cup), but otherwise as written with 1 ¼ cup water and 2 ¼ cup whole spelt. Oops again – forgot the extra 2 Tbsp water, so added after mixing. Totals so far: water = 1 ⅜ cup; flour = 2 ¼ cups + 1 ⅛ cup starter
Set sponge to rest in moist-bag environment at 8:45 AM. <<
(2.) At 3 PM (6 ½ hours rest) added about ¾ cup flour when I realized I’d not taken out a portion of the sponge for my next starter. So I removed 3 ladles-full of the thicker mixture to a jar, adding 2 ladles-full of water to get the right texture for a starter. Then finished adding the rest of the flour to the dough in bowl. I went by feel since part of the added flour went into the next starter; let it rest 5 minutes before adding last ¼ cup. Totals so far: water = 1 ⅜ cup; flour = 4 cups + ~0 net starter
(3.) Set to rest (autolyze) at 3:20 PM. At 5:15 (almost 2 hours) it had risen about an inch in the bowl.
Worked in the salt & oil; could have added more flour but will do that when shape loaf. Finger test at 6:40: it’s ready.

Before second rise
(4.) Kneaded in about 5 Tbsp unbleached white flour (wheat), about 10 minutes, then formed into loaf and put in buttered pan to rise in damp bag. Totals so far: water = 1 ⅜ cup; flour = 4 cups + 5 Tbsp + ~0 net starter
Photo, right of formed loaf before second rise.
Start oven preheat at 7:50. Did finger test at 8:30 PM – not ready yet and also still not to top of pan. 9 PM, almost to top of pan and tests almost ready. Into oven at 9:04 PM.  Reduced to 375°F at 9:30 PM; some oven-spring – center of loaf is above top of pan by about ¾”. Photo left: After oven spring.

Out of pan after baking
Out of oven at 10:17 PM; total time, 1 hour, 13 minutes. The cuts in the top had glued shut, so there are cuts along the top of the sides, as the dough sought to expand.
Sliced off a taste in AM (Photo, below). Mmm. It is a bit lighter than earlier loaves, but is still fairly dense. The surface is full of cooked bubbles. I can see how this would make a great mostly-white sourdough bread.

Sliced loaf
Finger tests for rise
- In bowl: Poke it with 2 fingers (apart), about 1/2” deep; if it holds the indent, it’s ready (per Bon Appetit (5), Choosing Voluntary Simplicity (6)) or if it mostly holds the indent but springs back a little (per Fresh Loaf (7).
- In pan: With one finger, make a SMALL dent in the dough near the side of the pan. If dent remains it is ready to bake. (from Choosing Voluntary Simplicity (6)).
Learnings:
- Let sponge and dough rise in my broiler in off-mode if my kitchen is too cool.
- Adding the salt as in this test works well: flatten dough, sprinkle salt over, moisten hands and rub in the salt, then knead.
- Use unbleached white for kneading – maybe crust will be more tender.
- If I want to use my smaller steel pan, cut down on ingredients, back to original except use more starter; thus: ¾ cup starter, 1 cup water, 1 ½ cup flour for sponge; another 1½ – 2 cups flour and 2 tsp salt the next day. Can also try adding ½ cup oil before adding salt.
- After less than good results also with Tassajara Sponge method, I concluded my starter was contaminated. I threw it out and tried a rye starter, but it too became contaminated. I waited quite a while and then made a spelt starter which seems to be working well with the Tassajara method. I’ve not yet tried it with Carla’s method because I like the Tassajara method so well.
References
- The Encyclopedia of Country Living: An Old Fashioned Recipe Book by Carla Emery
- Frazgo Feasting: Keeping sponge alive (frazgofeasting.blogspot.com/2009/03/hooch-and-keeping-your-sourdough.html) and Freeform, white flour, sourdough bread from a sponge (frazgofeasting.blogspot.com/2009/03/sourdough-bread.html)
- NW Sourdough’s Autolyze Experiments #1 (northwestsourdough.com/discover/?p=2558) and #2 (northwestsourdough.com/discover/?p=2603